Apple Extended Keyboard (m0115) Repair Teardown
I recently repaired an Apple Extended Keyboard (M0115). I took some pictures. This post is an excuse to show them. Repairs were successful, and I’m typing this post on it.
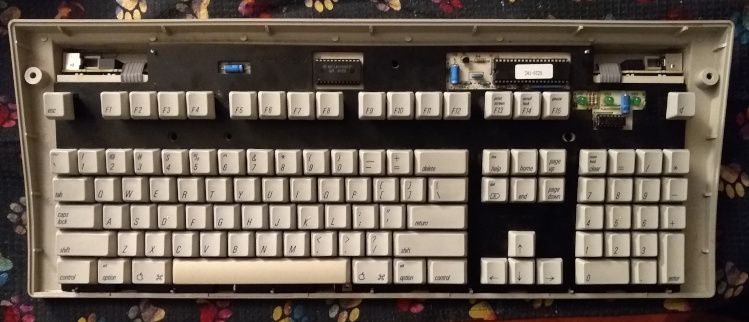
First, here’s the completed job:
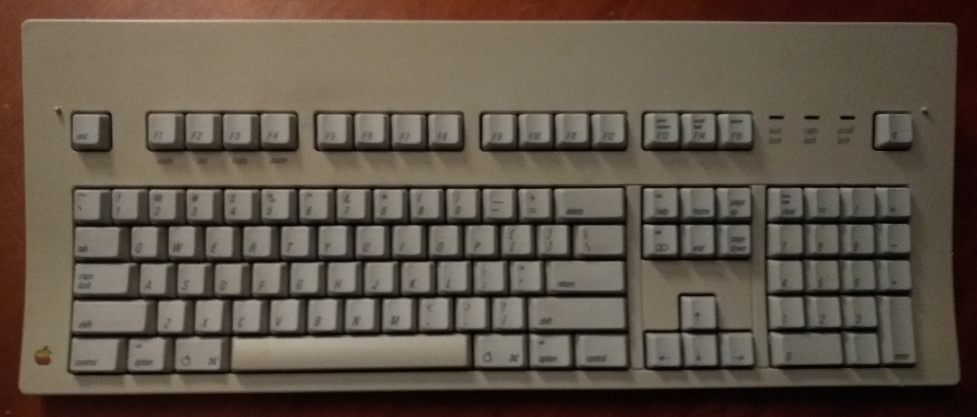
This picture doesn’t capture the pronounced S-curve top-to-bottom that the keys are laid out on, nor how loud and pleasant it is to type on. It’s quite nice… once it works.
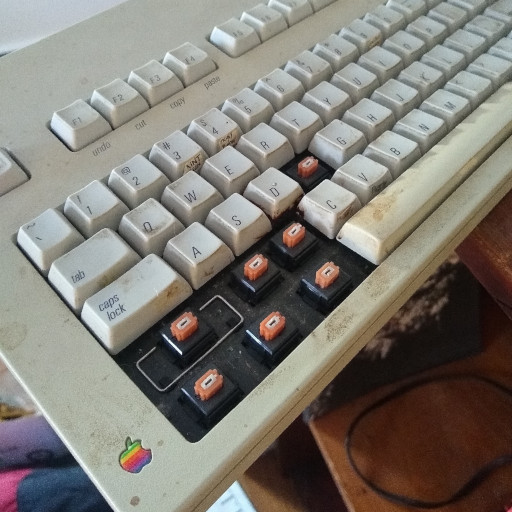
This will cause it not to work. I didn’t get from the previous owner what actually happened here, but my best guess from damage and residues (look at the ‘D’ keycap) is that a bottle of barbecue sauce fell on it from a great height. It takes quite a lot of force to snap the keycaps like that, and one of the internal struts as damaged too. It’s also positively filthy, but that might just be due to not being cleaned in 35 years.
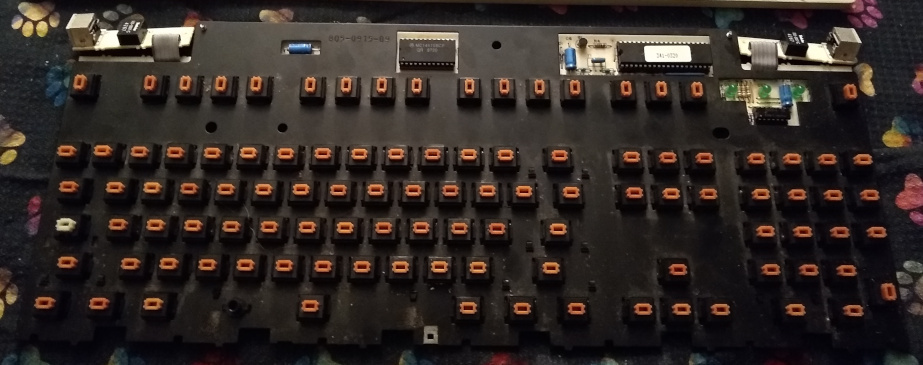
What we’re working with. I needed to disassemble it for cleaning and repair, so let’s walk through that quickly. Reassembly is of course the reverse, and I’m going to use photos from that because no one needs to see the filth that was in here.
Four Philips screws on the bottom.
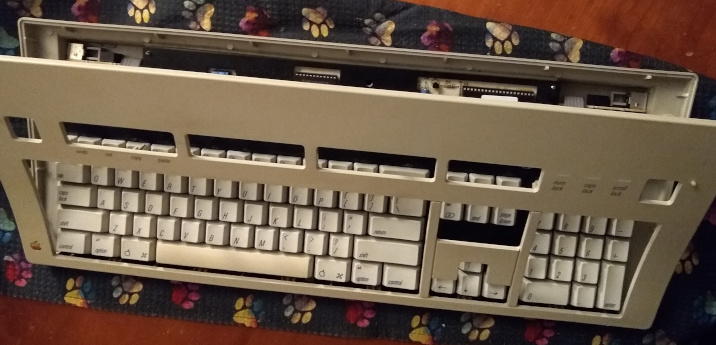
The case is additionally secured with clips. Some caution here is warranted - the case plastic is old and brittle. I release the top and two sides, then tip the whole thing forward, up, and out.
That exposes the inside. Two ADB connector boards on the top - careful when lifting these out. Set on a towel or some such, unless you hate your table.
To remove keycaps, we need to apply even upward force, distributed around the key.
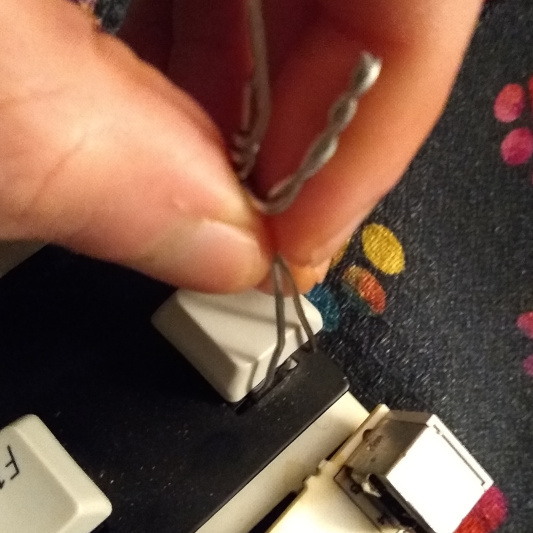
That keypuller is two bent paperclips, because I hate my hands:

That takes care of the normal-width keys. The wider (or taller, in the case of keypad enter) keys have an additional stabilizer:
The metal slides into two brown U-shaped plastic pieces on the keycap, and there are two clips on the mounting board. For removal, I use a screwdriver to separate the metal from the board clips first to try to keep them attached to the mounting board - but if you’ve bought an “AS-IS” ebay item that the previous owner spilled soda on, they may come detached regardless.
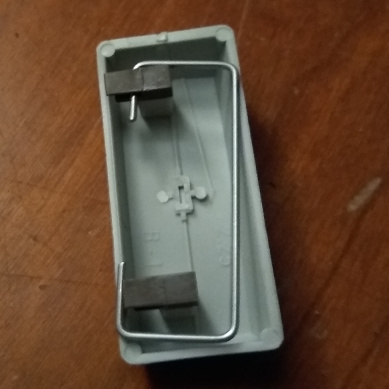
This picture is the broken left shift key, hence the broken post. As a side note, the only difference I’ve seen between these keycaps and those of the Apple Extended II (M3501) is that the M3501 uses black clips, while these are brown.
All keycaps removed, post-cleaning. The caps lock keyswitch is locking, so it’s a different color. As you can see, I’ve removed the broken bits by this point, so here’s a close-up of while that was happening (pre-cleaning, so with filth):
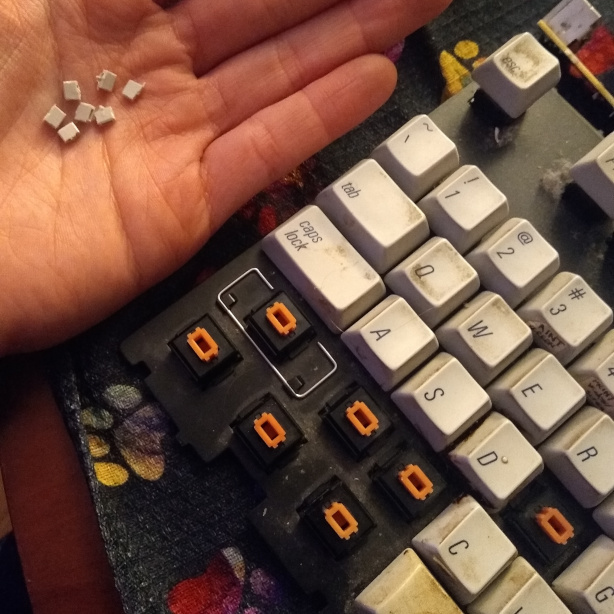
Due to what broken when, you can see the stabilizer attachment for left shift in this picture too. All keyswitches survived undamaged, fortunately.
For cleaning, the keycaps were soaked overnight in soapy water. That actually takes care of most filth, but since I was there already (and it didn’t quite get everything), I did a toothbrush pass as well. One consequence of this is that the labels which had been added to various keys did not survive, so here’s a picture of them from before:
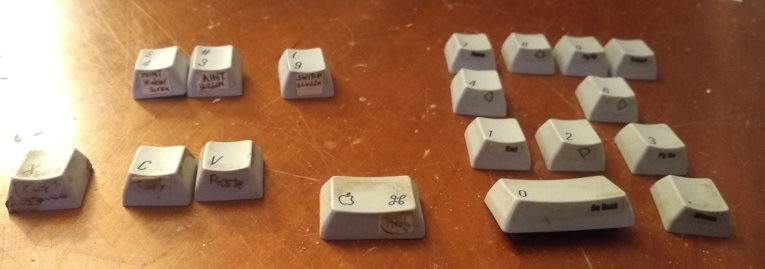
“PRINT Window / Screen” and “PAINT screen” eventually became Mac screen capture. On the numpad, these shortcuts are probably from Microsoft Word v1.06. The “Cut” / “Copy” / “Paste” on x, c, and v are interesting because they predate the ubiquity they now enjoy - the Apple Extended Keyboard’s upper case even preprints “undo cut copy paste” under F1 through F4. Finally, the Command key (which happens to be the one from the right) appears to say “MFinder” with a slash through it, which probably was to indicate that that the Mac OS 5-era MultiFinder multitasking was to be disabled on start. (“Switch screen” on 9 would be related to this as well.)